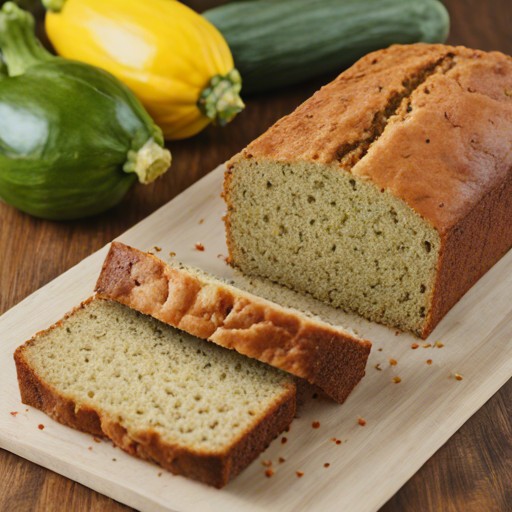
Sunshine in Every Slice: Summer Squash Bread Extravaganza
Get ready to embark on a journey of culinary delight with our Summer Squash Bread—an ode to the bounties of the season and a celebration of the versatile summer squash. This moist and flavorful bread captures the essence of summer in every bite, making it the perfect treat for breakfast, brunch, or a delightful snack. Join us as we dive into the world of summer squash, exploring how this humble vegetable transforms into a star ingredient in this delectable bread. From the first whiff of cinnamon and nutmeg to the last crumb on your plate, let the essence of summer unfold in each slice.
Ingredients
Produce
- 2 cups Summer squash, shredded
Refrigerated
- 3 Large eggs
Baking & Spices
- 3 cups All-purpose flour
- 3 tsp Baking powder
- 2 tsp Ground cinnamon
- 2 tsp Ground nutmeg
- 2 tsp Vanilla extract
- 2 cups White sugar
Oils & Vinegars
- 1 cup Vegetable oil
Instructions
Step 1: Embrace the Summer Squash
- Shred and Squeeze: Shred the summer squash using a box grater and gently squeeze out any excess moisture using a clean kitchen towel.
Step 2: Batter Bliss
- Egg Ensemble: In a large mixing bowl, beat the eggs until they are light and fluffy.
- Sweet Symphony: Add white sugar to the beaten eggs, creating a sweet symphony that will balance the flavors.
- Vanilla Elevation: Incorporate vanilla extract into the egg-sugar mixture, infusing it with a touch of aromatic elegance.
- Squash Unveiling: Introduce the shredded summer squash to the batter, ensuring it’s evenly distributed.
Step 3: Spice Waltz
- Flour Flourish: In a separate bowl, combine all-purpose flour, baking powder, ground cinnamon, and ground nutmeg. Mix them together to create a floury masterpiece.
- Gradual Integration: Gradually add the dry ingredients to the wet ingredients, stirring gently until a smooth batter forms.
Step 4: Oil Opulence
- Vegetable Oil Magic: Pour vegetable oil into the batter, enriching it with moisture and contributing to the bread’s tender crumb.
- Even Consistency: Stir the batter until the vegetable oil is thoroughly incorporated, ensuring an even and luscious consistency.
Step 5: Baking Ballet
- Preheat Performance: Preheat your oven to 350°F (175°C), setting the stage for the baking ballet.
- Grease and Flour: Grease and flour your chosen baking pans to prevent the bread from sticking.
- Pour and Level: Pour the batter into the prepared pans, leveling it to create an even surface.
Step 6: Oven Symphony
- Baking Brilliance: Place the pans in the preheated oven and let the bread bake for 50-60 minutes or until a toothpick inserted into the center comes out clean.
- Golden Glory: The top should be golden brown, and the kitchen should be filled with the irresistible aroma of summer.
Step 7: Cooling Crescendo
- Patience, Please: Allow the summer squash bread to cool in the pans for about 10 minutes before transferring it to a wire rack.
- Complete Cool Down: Let it cool completely on the rack before slicing. This step enhances the texture and makes for cleaner slices.
Cook Notes and Variations
- Nutty Nutmeg Crunch: Add a cup of chopped nuts—walnuts or pecans—for a delightful crunch and added flavor.
- Zesty Twist: Incorporate a tablespoon of freshly grated orange zest for a citrusy lift.
Keto Version
For a keto-friendly adaptation, substitute the all-purpose flour with almond flour or coconut flour. Use a sugar substitute like erythritol or stevia in place of white sugar.
Low-Carb Version
To create a low-carb version, reduce the amount of white sugar in the recipe. You can also experiment with alternative sweeteners like monk fruit or xylitol.
Frequently Asked Questions (FAQs)
Q: Can I use yellow squash instead of summer squash?
A: Yes, yellow squash is an excellent alternative and will bring a similar texture and flavor to the bread.
Q: Can I freeze the summer squash bread?
A: Absolutely! Wrap the cooled bread in plastic wrap and aluminum foil before placing it in the freezer. Thaw at room temperature when ready to enjoy.
Q: Can I add raisins or dried fruits?
A: Certainly! Enhance the bread with a cup of raisins, dried cranberries, or chopped dried apricots for a burst of sweetness.
Q: Should I peel the summer squash?
A: It’s not necessary to peel the summer squash. The skin adds color and nutrients to the bread.
Q: Can I use a different oil?
A: Yes, you can use melted butter or a neutral-flavored oil like canola oil as a substitute for vegetable oil.
Let the aroma of freshly baked Summer Squash Bread fill your kitchen, signaling the arrival of a delightful treat. This recipe transforms the simplicity of summer squash into a moist and flavorful bread that’s perfect for any occasion. Whether enjoyed with a spread of butter or served alongside your favorite hot beverage, each slice encapsulates the essence of the season. So, grab your apron, preheat the oven, and immerse yourself in the joy of baking this Summer Squash Bread—a celebration of summer’s harvest in every delicious bite!