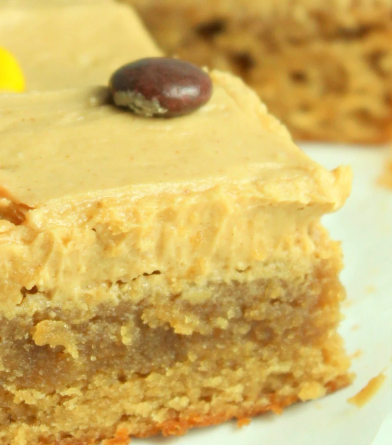
Dive into Decadence: Peanut Butter Bars Extravaganza
Embark on a journey of nutty nirvana as we present our Peanut Butter Bars recipe—a symphony of flavors and textures that celebrates the timeless combination of peanut butter and sweetness. These bars are not just a treat; they’re a testament to the joy that comes from indulging in a dessert that marries the creaminess of peanut butter with the perfect balance of sweetness. Join us in the kitchen as we unravel the secrets to creating Peanut Butter Bars that will elevate your snacking experience to new heights.
Ingredients:
For the Peanut Butter Base:
- 1 cup unsalted butter, melted
- 2 cups graham cracker crumbs
- 2 cups confectioners’ sugar
- 1 cup creamy peanut butter
For the Chocolate Layer:
- 1 and 1/2 cups semisweet chocolate chips
- 1/4 cup creamy peanut butter
For Garnish (Optional):
- Crushed peanuts
- Sea salt flakes
Instructions:
Step 1: Prepare the Peanut Butter Base
- In a medium-sized bowl, combine the melted butter, graham cracker crumbs, confectioners’ sugar, and creamy peanut butter.
- Mix until well combined and press the mixture firmly into the bottom of a 9×13-inch baking pan lined with parchment paper.
Step 2: Set the Base
- Place the pan in the refrigerator to allow the peanut butter base to set while preparing the chocolate layer.
Step 3: Melt the Chocolate
- In a microwave-safe bowl, combine the semisweet chocolate chips and 1/4 cup of creamy peanut butter.
- Microwave in 30-second intervals, stirring each time, until the chocolate is smooth and fully melted.
Step 4: Add the Chocolate Layer
- Retrieve the pan from the refrigerator and pour the melted chocolate mixture over the chilled peanut butter base.
- Spread the chocolate evenly using a spatula, ensuring full coverage.
Step 5: Garnish (Optional)
- Sprinkle crushed peanuts and sea salt flakes over the chocolate layer for added texture and a touch of savory contrast.
- Return the pan to the refrigerator to allow the bars to set completely, ideally for at least 2 hours.
Cook Notes:
- Pressing the Base: When pressing the peanut butter base into the pan, use the back of a spoon or a flat-bottomed measuring cup to create a smooth and compact layer.
- Chilling Time: Patience is key! Allowing the peanut butter base to set before adding the chocolate layer ensures clean layers and a better overall texture.
- Sea Salt Enhancement: The addition of sea salt flakes enhances the flavor profile, adding a delightful contrast to the sweetness of the bars.
Variations:
- Pretzel Crunch: Incorporate crushed pretzels into the peanut butter base for a delightful salty crunch.
- Jelly Swirls: Swirl raspberry or strawberry jam into the peanut butter base before adding the chocolate layer for a classic PB&J twist.
- Dark Chocolate Indulgence: Use dark chocolate chips for a richer and more intense chocolate layer.
Keto Version:
For a keto-friendly version of Peanut Butter Bars, make the following substitutions:
- Use almond flour or crushed nuts instead of graham cracker crumbs.
- Replace confectioners’ sugar with a keto-friendly sweetener.
- Choose a sugar-free peanut butter with no added sugars.
- Opt for sugar-free chocolate chips or use at least 70% dark chocolate for the chocolate layer.
Low-Carb Version:
To create a low-carb alternative:
- Replace graham cracker crumbs with crushed nuts or almond flour.
- Use a low-carb sweetener in place of confectioners’ sugar.
- Select a sugar-free or low-sugar peanut butter.
- Choose sugar-free or at least 70% dark chocolate for the chocolate layer.
Extended Instructions:
Step 6: Perfect Slicing
- Before slicing the Peanut Butter Bars, ensure they are fully set and chilled.
- Dip a sharp knife in hot water before each cut to achieve clean and smooth slices.
Step 7: Serving Elegance
- Arrange the bars on a serving platter or individual dessert plates for an elegant presentation.
- Dust with additional sea salt flakes for a sophisticated touch.
Step 8: Pairing Perfection
- Serve the Peanut Butter Bars with a scoop of vanilla or keto-friendly ice cream for a delightful contrast in temperatures and textures.
- Pair with a cup of hot coffee or your favorite tea to enhance the snacking experience.
Step 9: Storing Bliss
- Store any leftover Peanut Butter Bars in an airtight container in the refrigerator for up to one week.
- For longer storage, individually wrap the bars and freeze for up to three months.
In conclusion, our Peanut Butter Bars are a celebration of simplicity and indulgence—a treat that transcends generations and brings joy to every bite. From the velvety peanut butter base to the rich chocolate layer, these bars are a canvas of flavors that dance on your taste buds.
So, whether you’re planning a casual gathering, a sweet escape for yourself, or a gift for someone special, these Peanut Butter Bars are the answer. The combination of sweet and savory, creamy and crunchy, creates a sensory experience that will leave you craving more.
Indulge in the art of crafting these bars, experiment with variations to suit your taste, and share the bliss with those around you. Peanut Butter Bars are not just a recipe; they’re an invitation to savor the simple pleasures that come from creating and enjoying a classic and beloved treat.
Here’s to the joy of peanut butter, the delight of chocolate, and the pure bliss that comes from treating yourself to something sweet. Dive into decadence with our Peanut Butter Bars, and let the symphony of flavors take you on a journey of sweet satisfaction!

