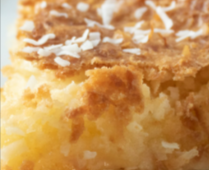
Rediscovering Tradition – Nana’s Old-Fashioned Coconut Pie Legacy
Embark on a nostalgic journey through the annals of time as we revisit the cherished recipe of Nana’s Old-Fashioned Coconut Pie. This time-honored treasure is more than just a dessert; it’s a testament to the warmth and love that transcends generations. Join us as we unravel the secrets of crafting this comforting pie, filled with the sweet essence of coconut and the embrace of cherished memories.
I. Ingredients: Crafting Timeless Sweetness
For the Coconut Pie Filling:
- 1 cup sweetened shredded coconut
- 1 cup whole milk
- 1 cup heavy cream
- 3/4 cup granulated sugar
- 1/2 cup all-purpose flour
- 1/4 cup unsalted butter, melted
- 4 large eggs
- 1 teaspoon vanilla extract
- 1/4 teaspoon salt
For the Pie Crust:
- 1 1/2 cups all-purpose flour
- 1/2 cup unsalted butter, chilled and cubed
- 1/4 cup granulated sugar
- 1/4 teaspoon salt
- 3-4 tablespoons ice water
Instructions: Weaving Time-Tested Magic
A. Crafting the Pie Crust:
- In a food processor, pulse flour, sugar, and salt.
- Add chilled butter and pulse until the mixture resembles coarse crumbs.
- Drizzle ice water, one tablespoon at a time, pulsing until the dough comes together.
- Shape the dough into a disk, wrap in plastic, and refrigerate for at least 30 minutes.
B. Rolling Out Pie Perfection:
- Preheat the oven to 375°F (190°C).
- Roll out the chilled dough and line a pie dish.
- Trim excess dough, leaving a slight overhang for a decorative edge.
C. Prebaking Brilliance:
- Line the crust with parchment paper, fill with pie weights, and bake for 15 minutes.
- Remove weights and parchment, then bake for an additional 10 minutes or until golden.
D. Crafting the Coconut Filling:
- In a bowl, combine sugar, flour, and salt.
- In a separate bowl, whisk together eggs, milk, heavy cream, melted butter, and vanilla.
- Gradually whisk the dry ingredients into the wet mixture until smooth.
- Stir in shredded coconut.
E. Baking and Nostalgia:
- Pour the coconut filling into the prebaked pie crust.
- Bake for 45-50 minutes or until the center is set and the top is golden.
- Allow the pie to cool before serving.
Cook Notes: Navigating Nana’s Legacy
- Perfecting the Pie Crust:
- Keep ingredients cold for a flaky crust.
- Use a light touch when rolling out the dough to avoid toughness.
- Ensuring Filling Harmony:
- Whisk the wet and dry ingredients separately before combining for a smooth filling.
- Allow the pie to cool gradually to prevent cracking.
- Shredded Coconut Brilliance:
- Toast the shredded coconut for added depth of flavor.
- Adjust sugar levels based on personal sweetness preference.
Variations: Modernizing a Timeless Classic
1. Tropical Twist:
- Add crushed pineapple to the filling for a tropical burst.
2. Nutty Crunch:
- Incorporate chopped macadamia nuts or almonds for added texture.
3. Citrus Infusion:
- Zest of lemon or orange in the filling for a citrusy surprise.
4. Chocolate Cozy:
- Sprinkle chocolate shavings on top or layer a thin chocolate ganache.
Keto Version: Nostalgia with a Low-Carb Touch
For the Keto Nana’s Coconut Pie:
- Replace all-purpose flour with almond flour or coconut flour in both crust and filling.
- Use a low-carb sweetener in place of granulated sugar.
- Adjust coconut quantities to fit personal carb limits.
Low-Carb Version: Savoring Memories Mindfully
For the Low-Carb Nana’s Coconut Pie:
- Opt for a nut-based crust using almond or pecan flour.
- Substitute heavy cream with coconut cream for a lower carb count.
- Utilize a sugar substitute in both the crust and filling.
A Slice of Family Heritage
In concluding our culinary expedition through Nana’s Old-Fashioned Coconut Pie, we honor the tradition, love, and nostalgia baked into every slice. This recipe transcends the kitchen, weaving a tapestry of memories that resonates with the essence of home.
So, whether you’re recreating a cherished family treat or experiencing Nana’s Coconut Pie for the first time, savor each bite as a connection to the past. This dessert isn’t just about flavors; it’s about the stories shared, the laughter echoed, and the enduring legacy of a recipe passed down through generations. Happy baking!

