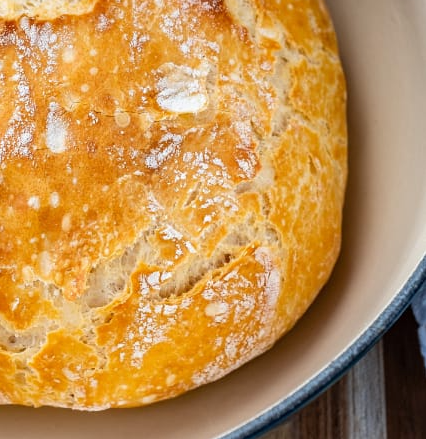
Unleash Your Inner Baker: Master the Art of Easy Dutch Oven No-Knead Bread
Embark on a culinary adventure that will awaken your inner baker with the simplicity and satisfaction of Easy Dutch Oven No-Knead Bread. In this guide, we will unveil the secrets to creating artisanal bread with a beautifully crisp crust and a soft, airy interior—all achieved with minimal effort. Let’s dive into the world of bread-making and discover how this foolproof method can elevate your home-baked bread to new heights.
Ingredients:
For the Basic No-Knead Bread:
- 3 cups all-purpose flour
- 1 and 1/2 teaspoons salt
- 1/2 teaspoon active dry yeast
- 1 and 1/2 cups lukewarm water
Instructions:
- Mix and Rest:
- In a large mixing bowl, combine flour, salt, and yeast. Add lukewarm water and stir until a shaggy dough forms. Cover the bowl with plastic wrap and let it rest at room temperature for 12-18 hours. This slow fermentation develops the bread’s flavor.
- Shape and Second Rise:
- After the initial rise, the dough will be sticky and bubbly. Generously flour your hands and a piece of parchment paper. Fold the dough over itself a couple of times to shape it into a round, then transfer it to the parchment paper. Cover it loosely with a kitchen towel and let it rise for an additional 1-2 hours.
- Preheat the Dutch Oven:
- Place a Dutch oven (with its lid) in the oven and preheat to 450°F (232°C) for at least 30 minutes.
- Bake in the Dutch Oven:
- Carefully remove the hot Dutch oven from the oven. Lift the parchment paper and place the dough (with parchment) into the pot. Cover with the lid and bake for 30 minutes.
- Uncover and Finish Baking:
- Remove the lid and continue baking for an additional 15-20 minutes or until the bread develops a golden brown crust.
- Cool and Enjoy:
- Allow the bread to cool on a wire rack for at least 1 hour before slicing. The crust will crackle and the interior will be tender and full of flavor.
Cook Notes:
- Flour Consistency: Use additional flour as needed during shaping to prevent excessive sticking.
- Dough Texture: The dough will be wet and sticky after the initial rise—this is normal and contributes to the bread’s texture.
- Parchment Paper Convenience: Using parchment paper makes it easier to transfer the dough into the preheated Dutch oven without deflating it.
- Dutch Oven Lid Importance: The covered Dutch oven creates a steamy environment during the initial baking, which enhances crust development.
Variations:
Rosemary Olive No-Knead Bread:
- Add chopped fresh rosemary and Kalamata olives to the dough during the initial mixing for a savory twist.
Cinnamon Raisin No-Knead Bread:
- Mix in ground cinnamon and raisins to the dough during the initial mixing for a delightful sweet variation.
Everything Bagel No-Knead Bread:
- Sprinkle the shaped dough with everything bagel seasoning before the second rise for a flavorful and aromatic variation.
Keto Version:
- Substitute almond flour for all-purpose flour to reduce carb content.
- Use a keto-friendly flour substitute like psyllium husk or coconut flour.
- Adjust the yeast amount or use instant yeast for a quicker rise.
Low-Carb Version:
- Opt for a low-carb flour alternative like almond flour or coconut flour.
- Experiment with savory additions like grated cheese, garlic powder, or herbs for added flavor.
- Monitor the water content to maintain the right dough consistency for a low-carb adaptation.
Easy Dutch Oven No-Knead Bread is more than a recipe; it’s a gateway to the joys of bread-making without the fuss. The anticipation as the bread bakes, the aroma that fills your kitchen, and the satisfaction of slicing into a freshly baked loaf—these are the rewards of this straightforward method. Whether you’re a seasoned baker or a novice, this recipe invites you to embrace the art of bread-making and savor the delicious results. So, preheat that oven, dust off your Dutch oven, and let the aroma of freshly baked bread fill your home, making every slice a testament to your newfound baking prowess.

