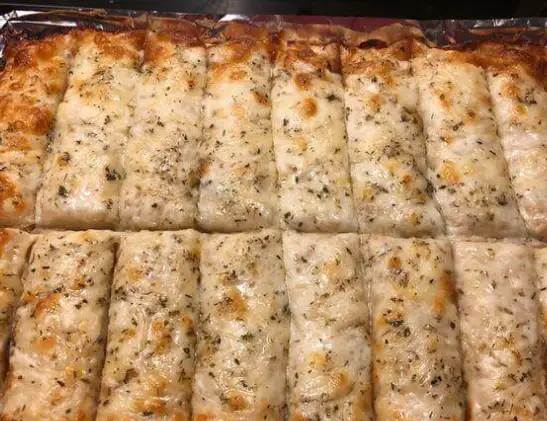
If you’re a fan of warm, cheesy, and garlic-infused breadsticks that melt in your mouth, then you’re in for a treat! These Cheesy Garlic Breadsticks are the epitome of comfort food – soft and fluffy on the inside, crispy and golden on the outside, and packed with savory cheese and aromatic garlic. Whether you’re serving them as an appetizer, side dish, or indulgent snack, these breadsticks are guaranteed to be a hit at any gathering. Join us as we embark on a culinary journey to create these delectable cheesy delights!
Ingredients:
- 2 cloves Garlic, minced
- 1 handful Fresh parsley, chopped
- 1 1/2 – 2 cups All-purpose flour
- 1 tablespoon Cornmeal
- 1/2 tablespoon Granulated sugar
- 1 tablespoon Dry instant yeast
- 1 teaspoon Italian herb seasoning
- 1 teaspoon Salt
- Salt and pepper to taste
- 5 tablespoons Unsalted butter
- 1 cup Milk
- 1 1/3 cups Mozzarella cheese, grated
- 1/2 cup Parmesan cheese, grated
- Water, as needed
Instructions:
- Activate the Yeast: In a small bowl, combine the dry yeast, sugar, and warm water. Let it sit for about 5-10 minutes until the mixture becomes frothy.
- Prepare the Dough: In a large mixing bowl, combine the flour, cornmeal, Italian herb seasoning, salt, minced garlic, and chopped parsley. Add the activated yeast mixture and melted butter. Gradually pour in the milk while stirring until a soft dough forms.
- Knead the Dough: Transfer the dough onto a floured surface and knead for about 5-7 minutes until it becomes smooth and elastic. Place the dough in a greased bowl, cover with a clean kitchen towel, and let it rise in a warm place for about 1 hour or until doubled in size.
- Preheat the Oven: Preheat your oven to 375°F (190°C). Line a baking sheet with parchment paper and set aside.
- Shape the Breadsticks: Punch down the risen dough and divide it into equal portions. Roll each portion into a long rope and place them on the prepared baking sheet, leaving some space between each breadstick.
- Add Cheese Topping: Brush the breadsticks with melted butter and sprinkle grated mozzarella and Parmesan cheese over the top. Season with a pinch of salt and pepper for extra flavor.
- Bake to Perfection: Place the baking sheet in the preheated oven and bake for 15-20 minutes or until the breadsticks are golden brown and the cheese is melted and bubbly.
- Serve and Enjoy: Remove the breadsticks from the oven and let them cool slightly before serving. Serve warm with your favorite marinara sauce or garlic butter for dipping.
Cook Notes and Variations:
- Customize the Herbs: Feel free to experiment with different herbs and seasonings to suit your taste preferences. Fresh basil, oregano, or thyme can be delightful additions to the dough.
- Add Extra Toppings: Enhance the flavor of your breadsticks by adding toppings like sliced olives, sun-dried tomatoes, or crispy bacon before baking.
- Make Them Gluten-Free: For a gluten-free version, substitute the all-purpose flour with a gluten-free flour blend and ensure all other ingredients are gluten-free as well.
Frequently Asked Questions (FAQs):
- Can I make the dough ahead of time? Yes, you can prepare the dough in advance and refrigerate it overnight. Simply allow the dough to come to room temperature before shaping and baking the breadsticks.
- Can I freeze the breadsticks? Absolutely! Once baked, allow the breadsticks to cool completely, then wrap them tightly in plastic wrap and aluminum foil before placing them in the freezer. To reheat, simply thaw in the refrigerator overnight and warm in the oven before serving.
- Can I use different types of cheese? Of course! While mozzarella and Parmesan cheese are classic choices, you can get creative with your cheese selection. Cheddar, provolone, or Gouda can all be delicious alternatives.
Keto and Low Carb Versions:
For a keto-friendly or low-carb version of these Cheesy Garlic Breadsticks, you can substitute the all-purpose flour with almond flour or coconut flour. Additionally, replace the granulated sugar with a keto-friendly sweetener like erythritol or stevia.
In conclusion, these Cheesy Garlic Breadsticks are a delightful combination of flavors and textures that are sure to please any crowd. Whether you’re serving them as a savory appetizer, side dish, or indulgent snack, they are bound to be a hit at your next gathering. With simple ingredients and easy-to-follow instructions, you can recreate this beloved classic in the comfort of your own kitchen. So roll up your sleeves, preheat your oven, and get ready to enjoy the irresistible aroma and taste of freshly baked Cheesy Garlic Breadsticks!